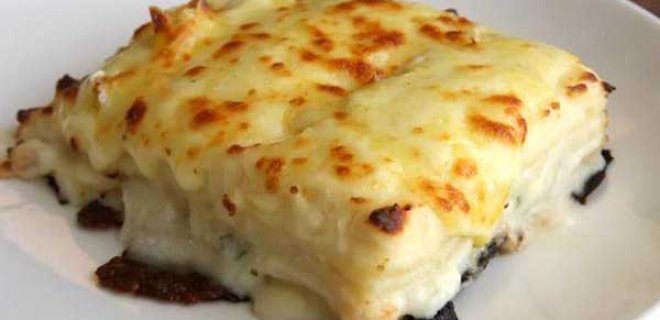
Baked pasta is the kind of dish that saves dinnertime. It fills you up. It satisfies cravings. And with the right twist, it transforms from a simple side into a main event. Specifically, oven-baked recipes create those incredible, crispy-edged flavors that stovetop options just can’t match. We have broken down five distinct ways to prepare this comfort food classic. Let’s start with the heavyweight champion of baked pasta.
Béchamel Baked Macaroni Step-by-Step
This version is often considered the king of baked pastas. The béchamel sauce adds a creamy richness that coats every noodle, leaving a taste that lingers long after the last bite. You need the right ingredients to get this texture just right.
Here is what you will need:
- 1 package of oven-safe macaroni (or standard pasta if you adjust cooking time)
- 2 tablespoons vegetable oil
- 2 bowls of grated kashar cheese (or sharp cheddar/mozzarella blend)
- 2 tablespoons butter
- 2 tablespoons flour
- 2 cups milk (not flour, despite the typo in some traditional lists; use milk for the sauce)
- Salt to taste
Note on the ingredients: Ensure you are measuring 2 cups of milk for the sauce, not flour.
How to prepare baked macaroni with béchamel
Start by boiling the pasta. You do not need to overcook it. Boil for about 8 minutes in a pot of salted water. It should still have a bit of bite.
Drain the water completely. Set the pasta aside.
Now for the sauce. Melt the butter in a saucepan over medium heat. Add the flour. Stir constantly. You are toasting the flour slightly to remove the raw taste. This takes a minute or two.
Begin adding the milk. Do not dump it all in at once. Add it in small increments. Whisk vigorously. You want to avoid lumps. Keep whisking until the mixture thickens. You want a smooth, creamy consistency. Once it coats the back of a spoon, take it off the heat.
In a large mixing bowl, combine the cooked macaroni, the béchamel sauce, and half of your grated cheese. Mix well. The pasta needs to be fully coated.
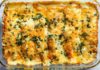
Transfer the mixture into a baking dish. Sprinkle the remaining cheese evenly over the top. This will get crispy and golden.
Preheat your oven to 190 degrees Celsius. Place the dish in the center rack. Bake until the top is bubbly and browned. This usually takes about 15 to 20 minutes.
The result is a dish that smells like home. It is warm. It is comforting.
Why stop there? There are four other ways to elevate this simple concept. But that is for next time. For now, enjoy the crispy edges.
The Ultimate Guide to Baked Vegetable Pasta: A Nutrient-Dense Meal for Busy Days
If you are looking for a way to sneak more vitamins into your weekly menu without spending hours in the kitchen, baked vegetable pasta is the answer. It is not just another carb-heavy dish; it is a vitamin powerhouse disguised as comfort food. The key lies in the ratio of vegetables to pasta and the creamy, cheesy topping that ties it all together.
Essential Ingredients for a Balanced Dish
You do not need a complex pantry to make this work. The ingredients are simple, accessible, and focused on flavor and nutrition. Here is exactly what you need to pull this off:
- 1 packet of pasta (any shape works, but shells or penne hold sauce better)
- 2 tomatoes
- 2 zucchinis
- 2 carrots
- 2 pointed peppers (bell peppers or mild chilies)
- 2 cloves of garlic
- 3 eggs
- 500 grams of milk
- 1 cup of grated kashar cheese (or a comparable semi-hard melting cheese like cheddar or mozzarella)
- Salt to taste
Step-by-Step Preparation
Getting the texture right is what separates a soggy mess from a satisfying meal. Follow these steps closely.
- Boil the Pasta: Start by boiling the pasta in a pot for exactly 10 minutes. You want it al dente —firm to the bite. If it gets too soft, it will turn to mush in the oven later.
- Shock the Noodles: Once boiled, drain the pasta and immediately rinse it under cold water. This stops the cooking process and keeps the noodles from sticking together.
- Prep the Vegetables: Chop the zucchini, carrots, and peppers into chunks. Do not make them tiny. You want visible pieces of vegetable that provide a bit of crunch and visual appeal.
- Sauté the Veggie Mix: Heat a pan and fry the chopped vegetables until they start to soften. Add the peeled, chopped tomatoes and finely minced garlic to the pan.
- Season and Combine: Add salt to the vegetable mixture. Stir well, then fold in the drained, cold pasta. Mix until every noodle is coated in the vegetable-scented oil and tomato juice.
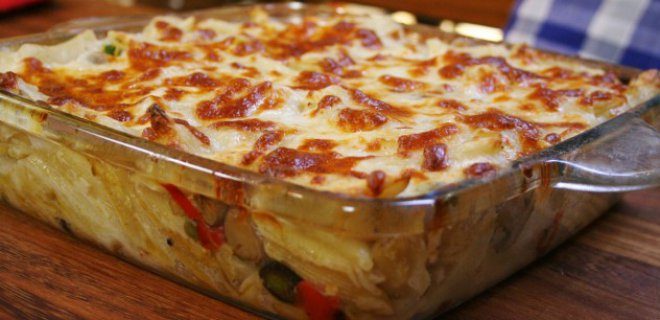
- Transfer to Baking Dish: Pour the pasta and vegetable mixture into a greased baking dish. Spread it out evenly.
- Create the Topping: In a separate bowl, whisk together the milk, grated cheese, and eggs. This creates a custard-like layer that will set in the oven, binding the dish together and adding richness.
- Bake: Pour this liquid mixture over the pasta. Place the dish in an oven preheated to 190°C (approx. 375°F). Bake until the top is golden brown and bubbly.
Why This Method Works
The cold water rinse is a non-negotiable step for many home cooks who skip it, resulting in clumpy, overcooked pasta. By shocking the noodles, you preserve their structure. Furthermore, frying the vegetables before baking concentrates their flavors. Raw vegetables in a baked pasta dish often remain bland or watery; cooking them first ensures they contribute sweetness
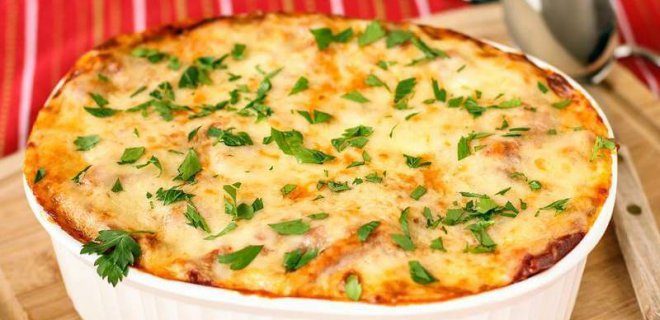
There is something deeply comforting about a dish that starts with a bit of prep and finishes with the satisfying crunch of browned cheese. This oven-baked chicken pasta recipe hits that sweet spot. It is not just another weeknight dinner; it is a structured meal that rewards patience with a rich, savory result. The combination of tender chicken pieces, fresh parsley, and a silky bechamel sauce creates a texture profile that feels both indulgent and manageable.
The secret lies in the balance. You want the pasta to hold up under the sauce without turning mushy. You want the chicken to be juicy, not dry. And you want that cheesy top layer to bubble and gold in the oven’s heat.
The Ingredients You Need
Getting the ratios right matters. This recipe relies on a classic bechamel base enriched with cheese and fresh herbs.
- 1 package of oven-ready or standard pasta (any shape works, but short pasta holds sauce better)
- 400 grams of chicken breast, cut into bite-sized cubes
- 2 tablespoons of vegetable oil for sautéing the chicken
- 2 cups of grated kashar cheese (or a good melting cheddar/monterey jack if kashar is unavailable)
- 2 tablespoons of butter for the sauce
- 2 tablespoons of flour to thicken the roux
- 2 cups of milk for the liquid base
- Fresh parsley, chopped finely
- Salt to taste
Note: The ingredient list in the source mentions “2 cups of flour” separately from the 2 tablespoons. In standard bechamel, 2 tablespoons is the correct amount for 2 cups of milk. Using 2 cups of flour would create an inedible paste. We proceed with the standard roux ratio of 2 tbsp flour to 2 tbsp butter for 2 cups milk.
Step-by-Step Preparation
Start with the pasta. Bring a pot of salted water to a boil. Add the pasta and cook it for exactly 8 minutes. This is slightly under the package instructions, but intentional. You want al dente pasta because it will finish cooking in the oven. If you boil it until it is fully soft now, it will turn to mush after baking. Drain the pasta and set it aside.
While the pasta cools slightly, build the sauce. This is where the flavor foundation is laid. Melt the 2 tablespoons of butter in a saucepan over medium heat. Once the butter foams, add the 2 tablespoons of flour. Whisk constantly. You are making a roux. Cook it for about a minute to remove the raw flour taste, but don’t let it brown. It should stay pale.
Now, the milk. Do not dump it all in at once. Add it in small increments. Whisk vigorously to prevent lumps. If you add milk too fast, you will get clumps of dry flour floating in liquid. Add it slowly until the mixture is smooth. Continue to cook and stir until the sauce thickens to a coating consistency. This is your bechamel. Take it off the heat once it coats the back of a spoon.
While the sauce simmers, handle the protein. Heat the 2 tablespoons of vegetable oil
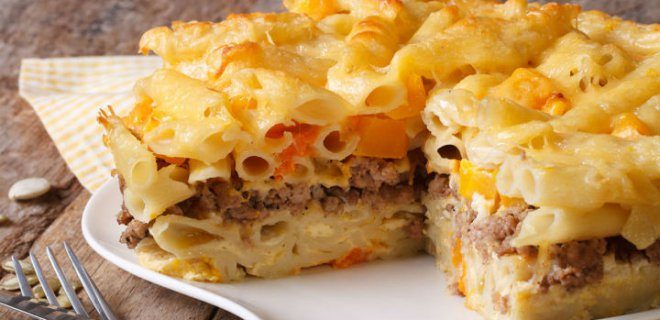
Kıymalı makarna mutfakta sıkça pişirilen, hatta bazen “hadi bir şeyler yapalım” denildiğinde ilk akla gelenlerden biri. Ama onu fırına atınca işler değişiyor. Üstü kızaran peynir, içindeki kremalı sos, o sıcak servis hali… Tam bir karn doyma noktası. Peki, bu klasik lezzeti evinizin oven’ında nasıl en iyi hale getiririz? Malzemeleri ve adımları net bir şekilde aşağıda.
Gerekli Malzemeler
Liste basit. Bulması zor şeyler yok. İşte fırında kıymalı makarna için ihtiyacınız olanlar:
- 1 paket fırın makarna (penne veya fusilli gibi sos tutan türler daha iyi sonuç verir)
- 350 gr kıyma
- 1 adet soğan
- 1 adet yumurta
- 1 kase rendelenmiş kaşar peyniri
- 2 yemek kaşığı tereyağı
- Karabiber
- Tuz
Hazırlık Aşaması: Pasta Gibi Olması İçin
İlk adım her zaman suyla başlar. Makarnayı bir tencerede haşlayın. Tam 10 dakika yeter. Ne fazla ne az. Süzün. Sonra hemen soğuk suyun altına tutun. Bu adım neden önemli? Yapışmasını engeller. Tekrar süzün ve kenara alın.
Şimdi sosun sırrı olan beshamel kremasını hazırlayalım. Tencerede tereyağını eritin. Unu ekleyip hafifçe kavurun. Kokusu değişmeden, sararmadan durun. Sonra sütü azar azar eklemeye başlayın. Çırpma teli elinizden ayrılmaz. Topak kalmadan, kıvam alana kadar çırpın. Ateşi kapatın.
Kıymalı Harç ve Birleştirme
Ayrı bir tavada tereyağını eritin. Soğanı rendeleyin. Havuç gibi ince ince rendelenmiş soğanlar daha hızlı pişer ve erir. Tereyağında soğanı kavurun. Sonra kıymayı ekleyin. Kıymanın rengi değişene, suyunu çekene kadar pişirin. Tuz ve karabiberi bu aşamada ekleyin. Baharatlar soğukta daha iyi dağılır ama pişerken eklemek de olur, tadı kontrol edin.
Büyük bir kaseye geçin. Haşlanan makarnayı, pişmiş soğanlı-kıymalı harcı ve hazırladığınız kremalı sosu ekleyin. İyice karıştırın. Her makarna tanecığı sosu sarmalı.
Üstüne rendelenmiş kaşar peynirini serpin. Yumurta sarısını ve bir tutam baharatı da bu karışıma ekleyip tekrar yoğurun. Yumurta, fırında pişerken yapıyı tutar, pe
Why Baked Creamy Mushroom Pasta Wins Every Time
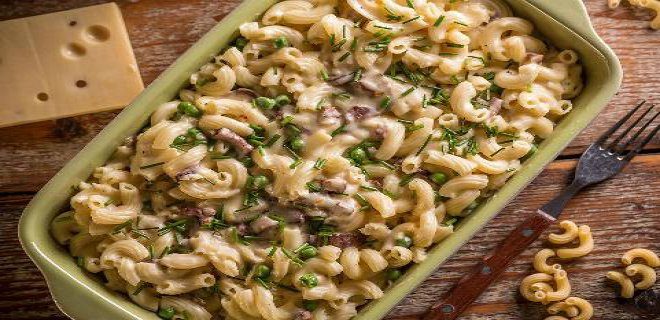
There is something deeply comforting about the marriage of cream and mushrooms. It is rich. It is earthy. It works. But what happens when you take that combination and bake it? The result is a dish that feels like a hug in a bowl. This baked creamy mushroom pasta isn’t just dinner; it is a mood.
The secret isn’t in complex techniques. It is in the layers. You start with the basics and build up.
What You Need to Make It
You don’t need a pantry full of exotic spices. Just the essentials that play well together.
- 1 package of baking pasta (macaroni or penne works best for holding sauce)
- 350 grams of mushrooms, sliced
- 1 cup of heavy cream
- 1 bowl of grated cheese (Kashar or cheddar melts beautifully)
- 2 tablespoons of unsalted butter
- Fresh dill
- Black peppercorns, freshly cracked
- Salt, to taste
The Step-by-Step Guide
The process is straightforward. No guessing. Just timing and temperature.
First, get the water boiling. Cook your pasta for about 10 minutes. You want it tender but still having a bit of bite since it will finish cooking in the oven. Drain it well. Excess water is the enemy of a creamy sauce.
While the pasta boils, turn your attention to the mushrooms. Slice them thinly. Thin slices cook faster and release more flavor. Heat the butter in a large skillet over medium heat. Once it foams, add the mushrooms.
Sauté them until they are golden brown. This takes patience. If you rush it, they steam instead of brown. You want that deep, savory color.
Once the mushrooms are ready, season them. Add salt, crack some black pepper over them, and toss in chopped dill. The herbs cut through the richness of the butter. Now, pour in the cream. Let it simmer gently. It should thicken slightly.
In a large mixing bowl, combine the drained pasta with the creamy mushroom mixture. Toss everything together until every noodle is coated. The heat from the pasta will help meld the flavors immediately.
Transfer the mixture to a baking dish. This is where the magic happens. Generously sprinkle the grated cheese over the top. You want a full blanket of cheese.
Preheat your oven to 200 degrees Celsius. Place the dish in the center rack. Bake until the cheese is bubbling and the edges are golden brown. Usually, this takes about 15 to 20 minutes.
Watch it closely. You want that crispy, cheesy crust without burning it.
The aroma alone will draw people into the kitchen. When you pull it out, let it rest for a minute. It holds together better that way. Serve it warm. It is simple. It is satisfying. And it is ready when you are.
The Ritual of the Last Sip
It’s funny how we treat the end of a meal like a race to be finished. We rush the last bite. We hurry the check. But in Turkish culture, there’s a phrase that slows time down completely. Afiyet olsun.
It’s not just “bon appétit.” That’s too simple. That’s just wishing you enjoy the food. Afiyet is deeper. It refers to health. Wholeness. It implies that what you’ve eaten has nourished your body, not just filled your stomach. So when someone says it to you after you’ve finished, they’re wishing you health from the meal. It’s a wish for the food to become part of you in a good way. No sickness. Just sustenance.
I’ve noticed this in Istanbul cafes and tiny kitchens in Brooklyn alike. You take that final sip of Turkish coffee. The grounds are left at the bottom. The cup is placed on the saucer with a soft clink. And there it is.
“Afiyet olsun,” the server says. Or your mother. Or your friend.
It’s a boundary marker. The meal is over. The social contract of sharing food is complete. But it also leaves a residue. Not literally. But emotionally. It lingers.
Think about how you close your own meals. Do you say thanks? Do you leave? Or do you let the silence stretch until someone breaks it? Afiyet olsun is a gentle way to say “we are done, and it was good.” It’s a soft landing.
In our busy lives, we often skip the closing ritual. We bolt out the door. We eat on the go. We don’t let the meal settle. But there’s value in that pause. In acknowledging the health aspect of what we consume. Not just calories. Not just taste. But afiye.
Try it next time you finish a meal. Say it to yourself. Or to someone else. Afiyet olsun.
See if it changes the way you feel about the empty plate in front of you. It’s not just food. It’s care. And when you leave the table, you carry that care with you. For a little while. Maybe even longer.